Showing posts with label The Pink Elephant. Show all posts

Monday, December 13, 2010

Winter ...

Over at The Pink Elephant blog we have a team challenge to create a Winter themed project. For my project I created this cute snowman shaped card

The snowman is from the Nitwitville digital kit from Nitwit Collections and the sentiment stamp is from Lili Of The Valley

Monday, November 01, 2010

The Pink Elephant Challenge

There is a new challenge over at The Pink Elephant challenge blog and this week we are sponsored by Die Cuts R Us. You can find out about the challenge at the Pink Elephant blog, this is my DT entry and I got to play with the Cowboy McCoy stamp by Lori Boyd.

(October Afternoon paper, Die Cuts R Us image stamp, button and twine from the Ribbon Girl, kraft card, star stamp and sentiment stamp from Papertrey Ink, star punch by Stampin Up)


Monday, October 04, 2010

Princess ...

This is my card for the Pink Elephant Challenge blog Design Team.  We were so lucky this week as we got to play with some of the new Lori Boyd PuddleJumper stamps, available here.  I just love this little Princess and of course she had to have a pretty pink dress and a bit of sparkle ;)

The saddlestitch and scalloped spot ribbon as well as the pins and bakers twine are from the Ribbon Girl, the little Princess charm is from the Hobby House, the digital paper is from this digital kit and I added some beautiful and very sparkly American Crafts Thickers and used Stickles for even more sparklyness

Monday, September 06, 2010

Sponsored by The Cutting Cafe ...

This week the Pink Elephant Challenge blog is sponsored by the Cutting Cafe
This is the card I made using some of the back to school files

Together with the Cutting Cafe files I used a cuttlebug embossing folder, Copics, Nestabilities die, this gorgeous and bright, cheerful spot paper from Crystal Wilkerson and that wonderful spotty ribbon is from the Ribbon Girl. I added the little white marks to make my apple look shiny and bright with a white inksentials pen and I drew the black checks around the border by hand

Wednesday, September 01, 2010

The Pink Elephant Challenge ...

The challenge over at The Pink Elepant this week is a colour challenge - mostly white.  I seem to be going through a 'white space' phase at the moment so I really enjoyed making this card - even more so as it was a sponsored challenge this week and I got to use this adorable digital stamp from Meljen Designs


I embossed my background with a Cuttlebug embossing folder to create a pattern without colour and made a tiny tag using a rubber stamp from Papertrey Ink.  I also chose to use this gorgeous striped twill from the Ribbon Girl, the colour is called celery - how delicious is that?

Monday, August 23, 2010

Exciting News Monday...

Exciting News Monday ... I just invented that! I thought that if any day needed a spot of excitement then it would be a Monday :)


Anyway, onto my exciting news - my lovely and so very talented friend Lori invited me to be on the Design Team of The Pink Elephant Challenge and today is my first time of playing along with the other girls.  It's a sponsored challenge this week by Inktegrity Digital Stamps and this is my card that I made based on the sketch


(I used On Sail digital stamp, cloud and sea digital papers, Copics, glitter and spotted ribbon from here)

Saturday, August 21, 2010

Hello!

Today over at the Pink Elephant Challenge we are showcasing some of Lori's digital stamps as well as focussing on how we colour them using our Copics. Our lovely friend Claudia at DieCutsRUs is having a huge Copics Sale so if you are in need of a few more pens to add to your collection then that is the place to go!

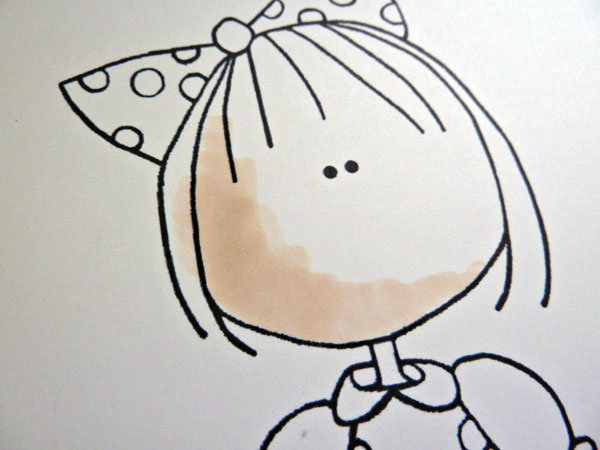
So, this is my card and how I coloured it. I am in no way an expert, just a beginner really so who knows if I'm doing the colouring correctly but I like how they look so for now I'm sticking with my method :)


For this card I cropped my digi stamp so that I only had the part I wanted to colour, enlarged it to fillmy cardblank and printed it. When I colour with copics I have my colour chart right next to my image so I can select just the right colours and compare what they will look like together

I start with the darker colours and blend outwards with lighter colours

I try to think about where the light and dark shadows would fall - but I'm not so good at that part :lol:

For the skin I used colours E00, E50, E53, YR0000 and I used the same colours for her neck, hands and arms

Moving onto the dress I used the darkest yellow at the top, sides and just a little around the spots

As I moved in towards the centre I used the lighter colours of yellow blending the edges so that they merged together


I used the same process to color the sleeves of the dress, starting with the dark and moving towards the light

For her bow in her hair I used the same darkest yellow as the dress in the centre of the bow

Then moved out towards the edges with the lighter colours, blending each colour over the top of the previous one

Here is the hair bow coloured in and you can see the darker and lighter areas

For the dress and bow I used Y17, Y15, Y08, Y00


I find colouring the hair really difficult so I will be watching the other girls to see how they do it. But me, I start with the darkest colour at the top of the hair

I blend over this with my middle brown colour

And then move down the length of the hair with the lighter of my brown colours
See how you can see the join where the lightest colour meets the middle brown, there is a line across her head!

So I blended all the colours using my lightest brown to take away the join lines

For the hair colours I used E29, E37, E49

Moving onto the spots on her dress I colour with the darkest pink first
Then blend in the lighter and I use the same process for the frills on her sleeves and around her neck

I used RV21, RV23, RV34 for the pink spots and the frill

And this, is the card that I made. I love the effect enlarging the digi stamp has and then just using a part of the stamp and I teamed it with Papertrey and Doodlebug cardstock and my circle and scalloped circle Nestabilities and some new ribbon that is coming soon to The Ribbon Girl.

See her cheeks - I cheated with my colouring and added her lovely rosy cheeks with Stampin Up chalk! and her freckles are done with a white pen

Tuesday, August 17, 2010

A Non Traditional Baby Card...

... Well at least it started out as being non-traditional until I added the baby :lol: but at least there is no pink or blue ;)  During the last 3 weeks whilst I have been enjoying the long summer holiday from school I have made a lot of cards but I think this just might be my favourite. I love all the white and red is one of my all time favourite colours so really I was onto a winner before I added one of my lovely friend Lori's digi Lollipop stamps :)


(I used a digital Lollipop stamp by Lori Boyd and ribbons from The Ribbon Girl, nestabilities dies, copics, Papertrey cardstock and sentiment stamp and the teeniest tiniest of diamonds (not quite as real as that sounds!) on the bow of the spotty nappy (diaper)

...and I am entering this into the CPS sketch challenge (which I LOVED by the way) as well as The Pink Elephant challenge blog which was to use ribbon and sparkle